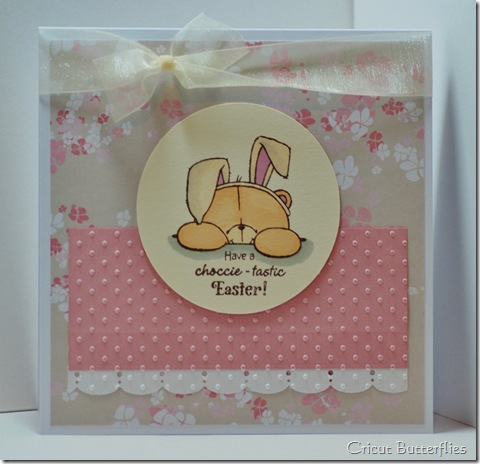
Saturday, 19 February 2011

Happy Birthday Jane!

Here is a card I made for my friend Jane, who’s birthday it is today!

DSC_0004

The image I have used is a LOTV Coffee Break and has been coloured with ProMarkers. The card base was made following a tutorial on the LOTV ideas to inspire blog.

I’m entering this card into the following challenges:

Friday, 18 February 2011

CSI Yarborough LO

DSC_0034DSC_0035DSC_0036

Thursday, 17 February 2011

Tenby LO

DSC_0058 (2)DSC_0065 (2)DSC_0066 (2)

Wednesday, 16 February 2011

Tuesday, 15 February 2011

The NEC ICHF LO

DSC_0020DSC_0021DSC_0024

Monday, 14 February 2011

Stamping 411 sketch challenge #190

DSC_0001

Here is a card I have made following the sketch at stamping 411.

Ink: Memento Rich Cocoa, Tim Holtz Distress Spun Sugar

Stamps: LOTV- Garden of wishes

Colouring: ProMarkers

Papers: Dovecraft Eastern Bloom 6x6

Embellishments: Ribbon, Button and glitter

Sunday, 13 February 2011

Friday Sketchers #141

DSC_0002

Here is a card I have made following the sketch at Friday Sketcher.

Ink: Memento Rich Cocoa, Tim Holtz Distress- Shabby Shutters and Spun Sugar

Stamps: LOTV- Christmas Sentiments and James Bear Wrapped in Tinsel

Colouring: ProMarkers

Papers: Dovecraft Fancy Christmas 6x6

Tools: Martha Stewart Boarder Punch

Saturday, 12 February 2011

LOTV Challenge #84

DSC_0001

Here is a card I made following the LOTV sketch which can be found by clicking here. The sketch is gorgeous and so is the the bunny rabbit stamp titled “The Night Before Christmas”. The image was stamped in rich coca Memento ink pad and coloured with ProMarkers. The background papers are from a dove craft pack titled “Fancy Christmas” and I used spun sugar distress inkpad around the edges.

This card is also entered into the following challenges:

Friday, 11 February 2011

2nd Bambi Card

DSC_0067

Thursday, 10 February 2011

Felt Owl

Here is an owl I made using felt, ric rac ribbon and a couple of buttons. I hand drew the template to make this and then marked it on the felt and cut out. I then stitched the pieces together using blanket stitch.DSC_0068

Wednesday, 9 February 2011

Love Struck Easel Card

Thought It was time I posted my Guest Design post that I gave you a teaser of on the 15th January. I produced this for the Cricutolics Forum.Cricutolics ForumSo here is the project I submitted:

DSC_0009 (8)

Perfect for those special loved ones on Valentine ’s Day. If you would like the cut file to create this project just email me and I will happily send it to you.


To complete this project you will need:
• Cricut Expression
• Cricut Cartridge Love Struck
• Cricut Cartridge George and Basic Shapes (Only needed for scorelines)
• A4 paper and card in at least 2 different colours
• Gems
• Foam Pads
• Sentiment Stamp
• Thin Ribbon


1. With Design Studio cut a card blank with the cut file and before unloading your mat turn the pressure and blade to 1 and then go to the mat called scorelines and click cut. You can now unload the mat and remove the cut.
2. Reload the mat with paper, I have used Ice white and go to the mat called Focal Image- Ice white and click cut. Again unload your mat and remove the cut.
3. Next reload your mat with card and use the Matt- Card part of the design studio file. You can then unload mat and remove the cut.
4. Now all that is left to do is assemble your card.
5. First take the card blank and fold on the score lines then cover the bottom half of the heart below the score line with adhesive then stick on the cut out of the heart that you have done in card.
6. Then put adhesive on the back of the focal image and stick this on top.
7. Next add the other heart don e in card to the inside base.
8. Take the white small heart and stamp on the front with a sentiment and then attach a foam pad to the bottom and stick on the base of the card so that it will keep the easel part of the card upright.
9. Now all that is left to do is add the finishing touches, I have added gems and a bit of ribbon.

Tuesday, 8 February 2011

2nd Forever Friends Easter Card

DSC_0013 (2)

Here is another Forever Friends Easter card made using the new stamp sets. The sentiment is also from the set and reads “bunnies, chicks and daffodils… the first signs of Easter!”

The paper is dove craft cupcake collection, boarder made using a Martha Stewart punch and the buttons were made with a Woodware punch.

Monday, 7 February 2011

How I take my photos

I have been asked by few readers how I take my photos of my cards.

My other hobby in my spare time is photography therefore my photos are taken with a Nikon D80 and a macro lens. The rest of my set up is very cheap and inexpensive. The materials I use are a tray with sides from pound land, 4 pieces of mount board and a day light lamp. Please see the picture below:

DSC_0001 (2)

Once I have taken my photos, I then edit them. Here is what an image looks like before editing:

DSC_0001 - Copy

I then take my image and edit using windows live photo gallery. The tools I use are crop, straighten image, adjust exposure and adjust colour until I am happy.
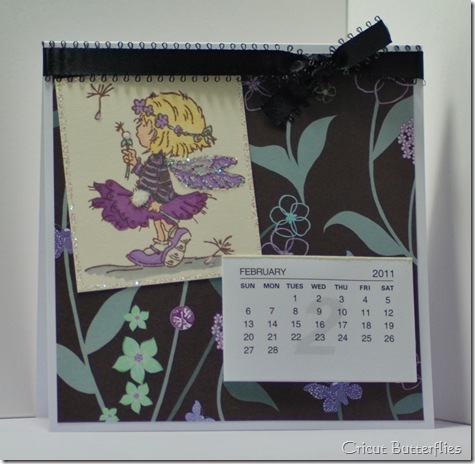
DSC_0001

It is now ready to be blogged about and all I now do is add a watermark via Windows Live Writer (program I write my blog posts in). Hope this has helped.

Sunday, 6 February 2011

The final LOTV Calendar of 2011

DSC_0001

This is the last calendar I have to share for 2011. This year I used the whole pack of 10 calendars. lol what an achievement.

The image is of dandelion clock by LOTV, is coloured with ProMarkers and has a few touches of glitter and flock. The background is from a dove craft 6x6 paper pack.

Saturday, 5 February 2011

I am the Forever Friends Favourite

Just checked the Forever Friends challenge blog and I am pleased to see that my card is their favourite for the current challenge.

Here is the card I made for the challenge which was spots and dots:

You can view my original post by clicking here. I would also like to take the time to both thank the Forever Friends design team and all the lovely people who posted comments on my card.

Flower (from Bambi) Card

DSC_0009

Here is the second card I have made using the Disney classics cricut cartridge.The image is of flower (from Bambi) and is paper pieced.

Friday, 4 February 2011

Thursday, 3 February 2011

Another LOTV Calendar

DSC_0002

Wednesday, 2 February 2011

LOTV Calendar

DSC_0004

Tuesday, 1 February 2011

Bambi Card

DSC_0008

The card above is made using the new Disney Classics cartridge. The image is of the adorable Bambi and is paper pieced. The brown parts of Bambi were cut use ice white paper and then inked with ink dusters and distress inks. I am really pleased with the result and look forward to creating a few more Disney cards.